Painting From the Ground Up!

I will often have elementary teachers ask me why I paint on coloured construction paper rather than white paper or manilla coloured paper.  First off…let’s talk about a ground.

ground or primer is the background surface on which you paint. It is usually a coating such as a gesso primer, which physically separates your painting from the support. It is the foundation of a painting, applied onto the raw canvas, paper, or other support.

When it comes to elementary children, the teacher can provide the foundation for any painting and drive her/his own chosen outcome, in a way, by selecting the colour of the ground.  I always recommend construction paper.  It is reasonably priced, compared to the cost of bond paper and it has tooth!  Just like the teeth in our heads, paper has tooth.  The more tooth, the more easily it is for oil pastels, chalk pastels and tempera paint to adhere.  This is something to think about as you choose your activities and this is something they don’t always teach YOU in your methods classes.  Believe me, the learning never ends.

I thought that this week I might try painting the same subject (Valentines) with Division I students, but provide different coloured grounds.  What happens when you create a ground other than white, is that you highly energize the surface before you even begin.  It feels exciting and fun to go ahead with a project.  Next, a coloured ground will do something to colour, in this case, tempera paint.  Sometimes the effect is NOT desired…you will learn what works by experimenting with what is stock piled in your storage spaces.  Let the students leave little bits of their paper ‘shining’ through in places.  Notice how delightful these are compared to white paper coming through in places.

This week, with grades one, two and three, I reinforced the techniques of using a flat brush to make wide lines and the same brush to make thin lines.  Demonstrate, initially, to show the students how to pivot their brush to create thin lines.  They are actually surprised by this simple tip.  Now…for the grounds.

PURPLE CONSTRUCTION PAPER GROUND

BLUE CONSTRUCTION PAPER GROUND

YELLOW CONSTRUCTION PAPER GROUND

The paint colours you provide the children with are also important considerations.  For a class of 26, you want to mix up 15 buckets (two brushes in a bucket) (only 1/4 full) of mixed tempera.  In the three projects above, red and white are pure and out of the bottles.  Every other colour has a little something else mixed in.  You can do it!  For tints, pour in the white to fill the bottom of the bucket and add a drip of another colour.  See what happens.  You’ve done those colour mixing experiments with your students in science…you can make lovely tints of orange and add a bit of red and see how it changes.  No!  Don’t add black to red to make dark red!  Instead, add a little titch of blue and see what happens!

So, take a look at the paintings above and ask yourself how each ground changed the experience of very similar colours.  The paintings on yellow, were painted with an analogous colour scheme…red, yellow and white.

The other two sets of paintings included blue and so they were painted using a primary colour scheme….red, yellow, blue and white.

There’s a song out there, “I Hope You’ll Dance!”  My motto is, “I Hope You’ll Paint!”

Have fun!  And happy Valentine’s next week!

Booth’s Class Reads The Mitten Tree by Candace Christiansen

As we moved through Advent at what seemed to be warp speed, I had the opportunity to be with Ashley’s class of Grade fours for a day.  The students were bright-eyed and receptive…an awesome little group.  Woven through the day seemed to be a theme of gift.  So, the story book that I had packed into my bag at home, seemed like it would work just perfectly.

The story I brought was The Mitten Tree by Candace Christiansen, illustrated by Elaine Greenstein.

I felt very peaceful.  Ashley’s class knows classroom routines and the learning environment feels ordered and safe. As we shared a discussion about gift, a story of my own came to mind.

I shared with the class my son’s most perfect gift to me…so many years ago, and I felt emotional, thinking about it.

In the afternoon, I pulled out my book and read it aloud to the students.  No matter the age, students, for the most part, fall silent at the reading of a picture book.  It was no different on that day.  While I’m not crazy about this particular delivery, I did find the story on Youtube.

I would consider the painting activity to be an Expression lesson.  I did not focus too much on skills related to depiction or composition, but focused on how to hold a brush and the idea of stroking paint instead of scrubbing paint.  I guess the interesting thing about asking the students to paint two mittens is the idea that the patterns would match…so they were exploring two things in duplicate.  At some point, I adjusted my own system of sharing buckets of coloured tempera, but quickly fell back to my fail safe routine when I observed the chaos in trading that can ensue.  I had intentionally limited the number of buckets I prepared on this day for the simple reason that I didn’t want a big clean up at end of day, so I prepared 14 buckets for 24 students.  Normally, I would prepare 18.  So, you can imagine that, at times, you would hear someone belt out, “Are you done with the white?”

Thank you, Dana, for your wonderful assist.

The paintings, in the end, were lovely. The Pinterest crowd will find a whole variety of projects based on this story book including fabric arts, oil pastel drawings and paper cut outs…lots that you can do around a story. Advent and Christmas art abounds at the moment, I thought that these paintings might bring the spirit of winter into the classroom, for a longer duration.  Thank you, Ashley.  Thank you, Grade four students. I had a beautiful day!


Grade Four’s Homage to Ted Harrison

A beautiful person and artist, Ted Harrison passed away on January 16, 2015, at the age of 88.  The world is losing so many heroes…and Ted is one.  Having a beautiful heart and eye for simplicity, he loved the northern skies of the Yukon and never failed to share his delight with anyone he met.

One of my big encounters with his illustrations was in the beautiful version of The Cremation of Sam McGee…a poem I used to challenge my grade sevens to memorize from beginning to end.  And every year, at least three students did!

I recommend that you introduce Ted Harrison to your classes.  For years, Ted’s work has inspired works by school children of every age.  When scented coloured markers came into vogue, so did another lesson based on Harrison.  It’s wild what variety of lessons we invented as art teachers.  The students loved it all!

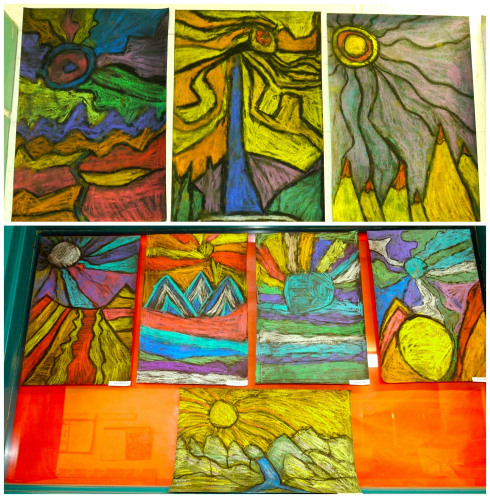
Ted Harrison in Grade One Ted Harrison in Oil Pastel Ted Harrison in ChalkSomething I appreciate Ted saying in the video below is that if one is ever tired of life or inspiration, try looking up at the sky.

So, today…I looked up at the sky.

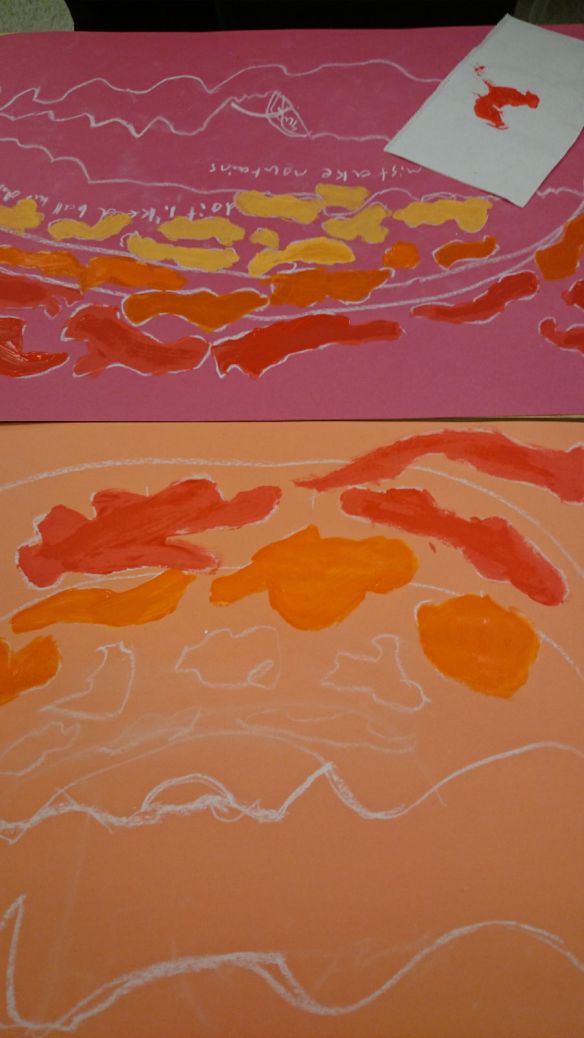
This morning, driving to school, I noticed a dappled sky above the rising sun…brilliant yellow, pink and orange, with a soft cerulean blue below an arch of cloud and an electric blue, above.  That was it…in the afternoon, I would paint the SETTING sun with the grade fours…thinking about chinook arches and dappled clouds over the mountains.  And so it went.

I line the back of construction paper with masking tape, when I can find the time.  This allows some durability.  Tempera paint tends to make paper, especially cheap paper, a bit crunchy after a while.  This way the work can be preserved for those folks who like to save things forever. (pointing at myself)

??????????Always use coloured paper for these paints as it creates a bit of an ‘under painting’ and activates the surface, taking away the intimidation of white or that ucky beige.  Below…see my favourite yogurt buckets.  Every art storage room needs at least twenty of these to be shared around.

DSC_1942Recess and the painting pods are readied…that, and a piece of chalk for drawing, placed at each desk.

??????????A paint station (Palette) is readied…two brushes in each bucket.  Students travel back and forth with colours agreed upon by every pair…back and forth they go.  The place is like a HAPPENING!

DSC_1945 DSC_1946I always work through a sample…don’t expect to have the students do something that you haven’t…how else will you know their struggles or the pitfalls of the lesson?

First…the short ‘review’ of dip, wipe and stroke.  Surprise!  You always discover that a lot of students haven’t handled a brush very much.  (Painting IS MESSY!!) Show them where to hold the brush…not at the white tip.  :0)  Explain how to share the paint center and remind them to keep two hands on the bucket on each journey to and from.

Regarding the composition, first I spoke about portrait as compared to landscape format and explained that just for today, the composition would be landscape.  I explained how clouds that are closest to the horizon line appear smaller…and as they are found higher in the picture plane, they can be depicted as larger and then they almost seem to come over our heads.  “Often, Ted Harrison outlined some basic shapes in his paintings and serigraphs…instead of painting up to the chalk lines, how about leaving some of the paper unpainted and the coloured paper will become the lines?” (some of the students got this)

“No…I don’t want you to do a giant sun.  No…no sunglasses…no rays…not today.”  I went back to describing how the morning sun had not yet shown itself, but that there was a really bright light next to the land.  I knew the sun was coming up.  So…for the sunset paintings, I hoped that the sun would be almost gone from the sky.  The teacher can always drive the vision…as long as he/she has one.  I’m sharing mine with my readers.  The teacher also benefits by allowing freedom within the vision.

“OH!  Why are those small clouds near the mountains the brightest?  YES!  The light from the sun is hitting them first because they are the closest to the light!

I explained that because the students were focused on the sky, the mountains needed to be located below the one third line. (Yes!  You’ll have to talk about dividing the landscape into thirds.)

The chalk is picked up and the students begin drawing, planning, and problem solving.

“Yes!  As soon as you’re ready, you can get your first colour. PLEASE, don’t everybody begin with the mountains!  Choose any colour and away you go!”

Magic happened.

DSC_1948 DSC_1949 DSC_1950 DSC_1951 DSC_1952 DSC_1953 DSC_1954 “Pick up a paper towel with your first bucket of paint.  This will be your place mat…slip it along the edges as you go and then you won’t have to wash your desk!  If this gets super sloppy, you might need a second place mat.” DSC_1956I asked the kind caretaker if I might have a bucket half filled with water in my classroom.  This would provide a portable sink.DSC_1957 DSC_1958 DSC_1959 DSC_1960 DSC_1961 ??????????Tonight, as I walked Max at the pond…I captured some of the clouds.  We had an energetic hike about the area.  It was so darned beautiful!

DSC_1968 DSC_1967 DSC_1966 DSC_1964A wonderful class!