That’s a question I asked Grade Two this morning and there were only three students who had seen Cardinals and they were delighted to tell their stories; two of the three had seen Cardinals on television. The most interesting story was the one told by a wee boy about going on a trip to see Grampa and in the wilderness (his word) they saw four red birds. I told the story of seeing Cardinals in Belleville, Ontario when I went there to visit my father. Someone talked about those kind of birds having Mohawks on the top of their heads. And then this guy came up.
 I’m going to tell you the truth…I found today’s idea on Pinterest. YIPPEE! Inspired by illustrator, Charlie Harper, many variations of this same activity can be found and managed, with, I hope, a focus on unique interpretations of the theme. Here in Calgary, these children would not be as familiar with Cardinals as they would be with Northern Flickers and Magpies. I think these activities could be suited for local birds as well. But today, I was into the red.
I wanted to manipulate the compositions to teach EMPHASIS and so the red was a pop of colour in an otherwise muted background.
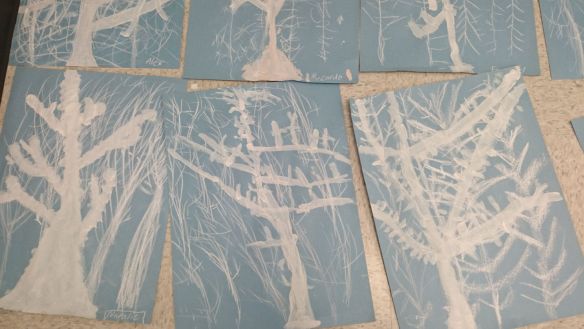
Materials: Blue 18 x 24 construction paper with tooth. White chalk for foggy fuzzy edges of background trees, White tempera, large bristle brushes, flat, two sheets of red poster board cut into small squares….two sheets enough for 23 students.
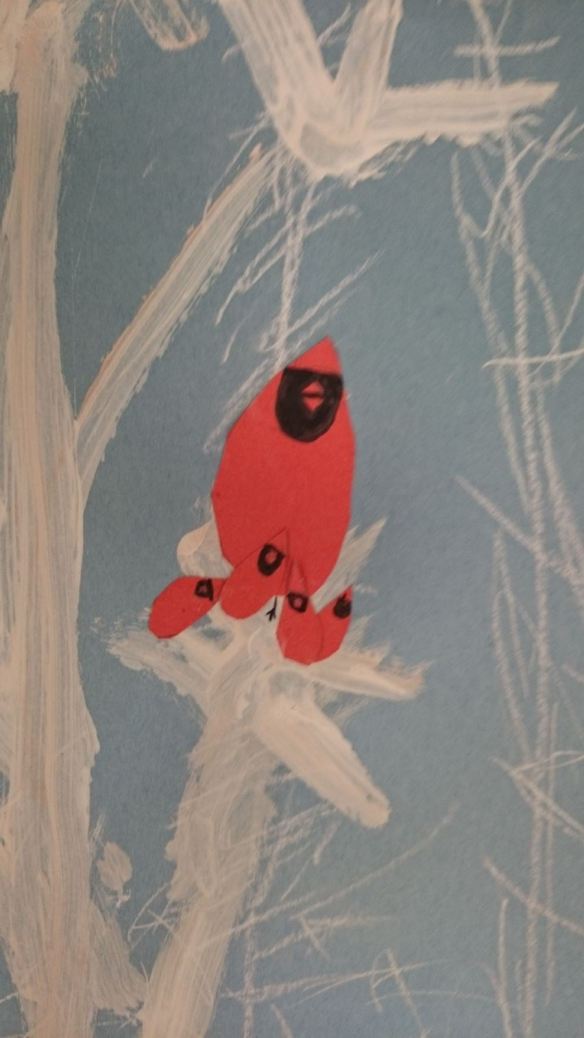
First, the students had depiction time. I talked to them about how the Cardinals that we created were going to be like cartoons of birds. Every single bird would look different depending on a lot of factors. To begin with, we would practice drawing shapes…the body being a raindrop shape with the Cardinal’s Mohawk feathers on the top. “Try big wide raindrop shapes and thin ones. Try big and small.” This little sketch was borrowed from one variation of this art lesson, found at Art On My Hand.
 The eyes will be oogie boogie eyes that pop out past the bird’s body. The legs…”Try long, short and bent. How can you make the bird look like it’s flying? How can we show wings? The beak is like a diamond shape and then just draw a line through the middle.”
Our drawing practice looked like this.


 After sketching for a while and exploring all sorts of possibilities, out came the large blue paper. I demonstrated how to press chalk and make dark lines and then showed how to move it and press on it to create light marks. I touched the top of my paper and the bottom, on a vertical, to show how large the background trees needed to be. I asked if any of the students had been outdoors recently when we had wind and snow and fog. Lots of stories there! :0) “What did the trees look like?”
“Our foreground tree…the one the closest to us…is more detailed. We see more when something is close to us. I can see your noses right now, but….when you are out on the playground, I can’t. We will paint the tree that’s close to us. What do we call a tree’s body? (trunk) What about its arms? Where are its legs? (limbs, branches? and their legs are underground) What about its fingers? toes? (It’s fingers are twigs. branches?) Expression and Composition time…with one short pause to remind the class not to SCRUB, but to STROKE. Here is what their trees looked like. Off you go! Recess! PUT ON YOUR SNOW PANTS!

 Ti
Ti  After recess, not much had to be said…a factory of Cardinal makers nested at their desks and the room was an industrious hush. Absolutely amazing stuff as they created, invented, problem solved. We all agreed that the tools we needed from the bins were scissors, glue sticks and thin black markers. The fat ones were just too tricky.
This is what they created.


 Thank you, Grade Two, for an amazing day at Our Lady Of the Evergreens School


